Fitting a Td5 exhaust manifold kit
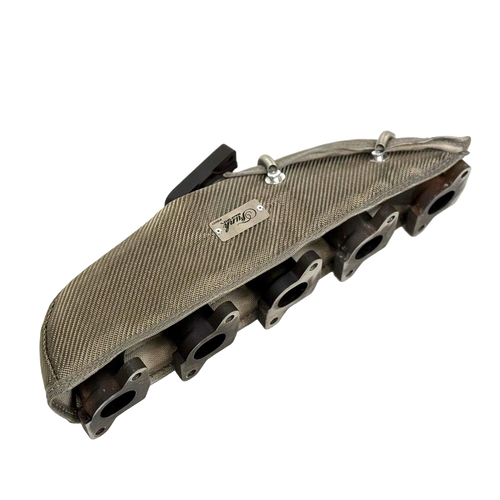
The kit fits the same way as a standard Td5 manifold. The only differences are the longer studs and a spacer under each nut, which lets the manifold expand and contract without pulling on the studs. Allow most of a day, longer if a stud has snapped.
Before you start
- Work on a cold engine. Soak every stud and nut in penetrating oil the day before.
- Parts: the TotalTd5 kit (manifold, longer studs, spacers, nuts and gaskets), two new EGR pipe Allen screws, an EGR gasket and new sealing washers for the turbo oil feed.
- Tools: 6, 8, 13 and 14mm sockets and spanners, an Allen socket on an extension for the EGR pipe, a torque wrench and a stud extractor.
Taking the old manifold off
- Disconnect the air flow meter plug and take off the intake hose between the air filter box and the turbo.
- Remove the manifold heat shield (three bolts; the rear one is awkward to reach) and the upper fan cowl.
- Undo the turbo oil feed banjo bolt and the three nuts holding the turbo to the manifold. Cover every opening so no dirt gets in.
- On vehicles with air conditioning, take off the auxiliary drive belt, remove the four compressor bolts and move the compressor aside. Leave the pipes connected.
- Remove the two Allen screws holding the EGR pipe to the manifold and throw them away.
- Remove the ten manifold nuts, ease the manifold off its studs and remove the old gasket.
If a stud has snapped
Snapped and pulled studs are the reason most Td5 manifolds come off. Work slowly, because the studs sit in an aluminium head.
- If enough stud stands proud, lock two nuts together on it, or use a stud extractor, and wind it out.
- If it has broken flush, it has to be drilled and extracted. Keep the drill square to the head.
- If the thread in the head has pulled out, it needs a thread repair insert. If you're not confident, stop and book it in with Dean. A damaged head costs far more than the fitting.
Fitting the kit
- Clean the head face so it is flat and free of old gasket. Clean the stud holes.
- Screw the longer studs into the head by hand, then snug them using two nuts locked together. Don't force them into the aluminium.
- Fit the new gasket and slide the manifold onto the studs.
- On each stud fit a spacer, then the nut. The spacer always goes on before the nut.
- Run all ten nuts down finger tight, then tighten them evenly, working from the centre outwards, to 25 Nm. This is the order the Land Rover manual gives.
- Fit the turbo to the manifold with a new gasket and tighten its three nuts to 30 Nm.
- Clean the oil feed pipe, banjo bolt and turbo port, then reconnect with new sealing washers and tighten the banjo bolt to 25 Nm.
- Refit the EGR pipe with a new gasket and new Allen screws, tightened to 10 Nm.
- Refit the compressor (25 Nm) and drive belt, then the manifold heat shield (M6 bolts 9 Nm, M8 bolt 25 Nm), fan cowl and intake.
- Start the engine and check for leaks once it's warm. When it has cooled, check the manifold nuts again.
| Fixing | Torque |
|---|---|
| Manifold nuts (over the spacers) | 25 Nm (18 lbf.ft) |
| Turbo to manifold nuts | 30 Nm (22 lbf.ft) |
| Turbo oil feed banjo bolt, new washers | 25 Nm (18 lbf.ft) |
| EGR pipe Allen screws, new | 10 Nm (7 lbf.ft) |
| Manifold heat shield bolts, M6 / M8 | 9 Nm / 25 Nm |
| Exhaust front pipe to turbo | 27 Nm (20 lbf.ft) |
| Air conditioning compressor bolts | 25 Nm (18 lbf.ft) |
Figures from the Land Rover Discovery 2 and Defender Td5 workshop manuals. See the manifold kit
Parts for this job

Rather have Dean do it? Fitting is at our Pelsall workshop, by appointment only.
About the manifold kit